Manual Entry
The SIC Instant Manual Entry screen allows users to create a new SIC Instant Credit Transfer manually.
This screen is typically used for exceptional cases where a payment cannot be received via an external interface and must be entered directly.
Overview
The form is divided into logical sections (e.g., Debtor Bank, Creditor Bank, Debtor, Creditor, Purpose, Remittance Information).
Each section can be collapsed or expanded to simplify data entry.

Entering a New Payment
Follow these steps to manually create a SIC Instant payment:
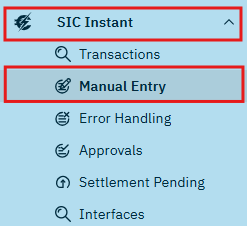
- Open the Manual Entry screen
- Click on the SIC Instant menu in the navigation panel on the left side.
- Click on Manual Entry to open the related screen in the content area.
- Fill in the required payment details in the form.
- Review all information for correctness.
- Click Submit to send the payment for processing.
To reset all fields and clear the form, click Reset Form.
Field Behavior and Rules
Screen Overview
The main areas of the Manual Entry screen:
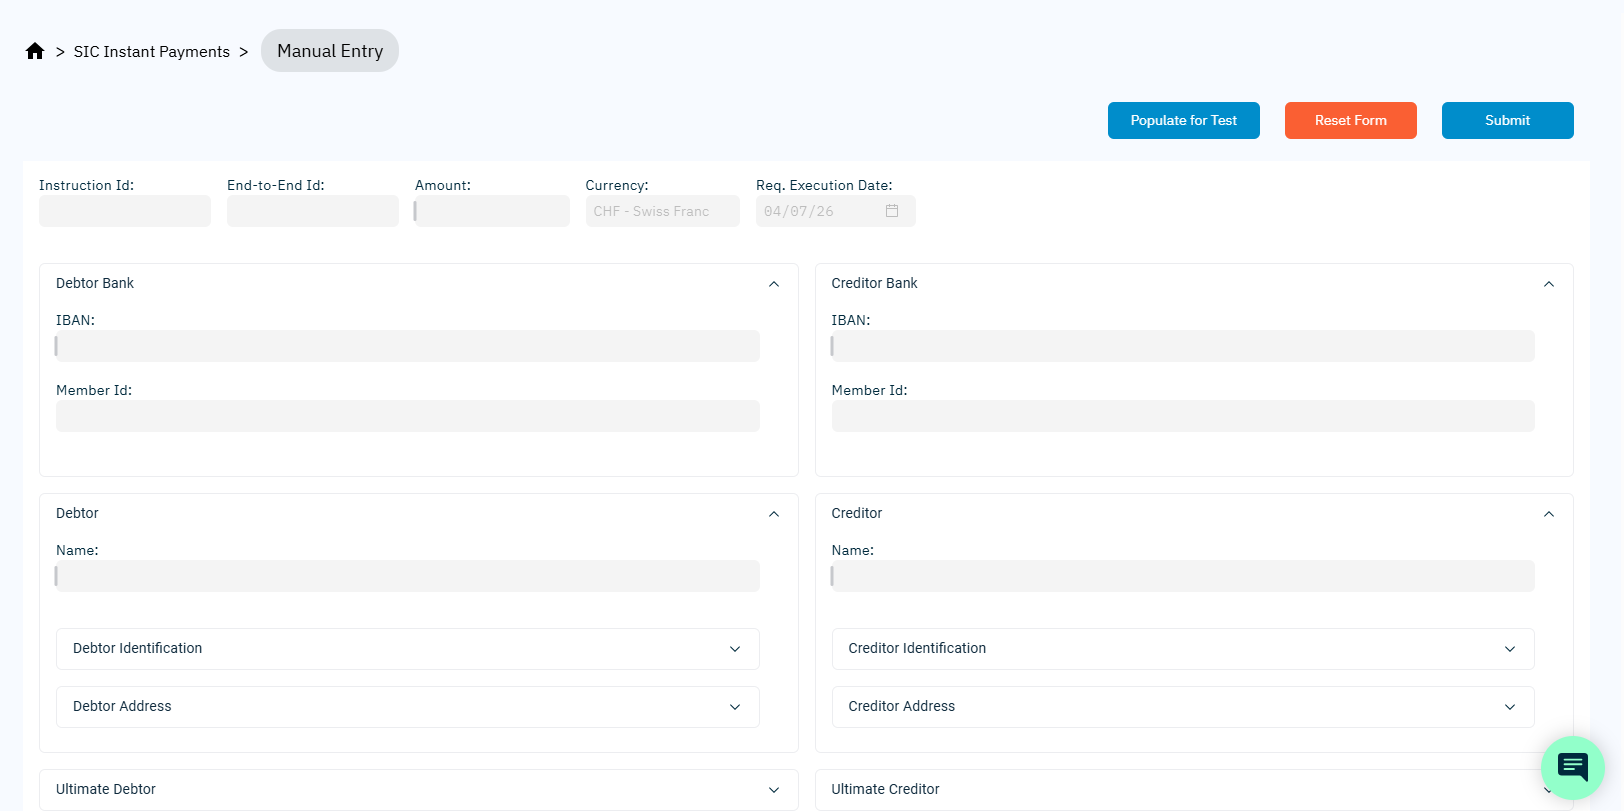
- Header Fields – Amount, Instruction Id, End-to-End Id, Currency, Requested Execution Date
- Debtor Bank & Creditor Bank – IBAN and Member Id fields (expandable sections)
- Debtor & Creditor – Party name, optional identification and address details
- Additional Optional Sections – Ultimate Debtor/Creditor, Purpose, Remittance Information, Category Purpose
- Form Actions – Reset Form and Submit buttons
Collapsible Sections
All form sections can be collapsed or expanded by clicking the arrow icon next to the section title.
This allows you to focus only on the information you currently need to enter.
Predefined Data for SIC Instant
Since this form creates a SIC Instant Credit Transfer, the following fields are fixed and cannot be modified:
- Currency: CHF (Swiss Franc)
- Requested Execution Date: Today’s date
These values are pre-set to comply with SIC Instant payment rules.
Mandatory Fields
The following data is required before a SIC Instant payment can be submitted:
| Field | Section |
|---|---|
| Debtor IBAN | Debtor Bank |
| Debtor Name | Debtor |
| Creditor IBAN | Creditor Bank |
| Creditor Name | Creditor |
| Amount | Header section |
The Submit button remains disabled until all mandatory information is provided.
Validation
The platform validates your input continuously while you type and again when you attempt to submit the form. This ensures that all data is correct and complete before a payment is created.
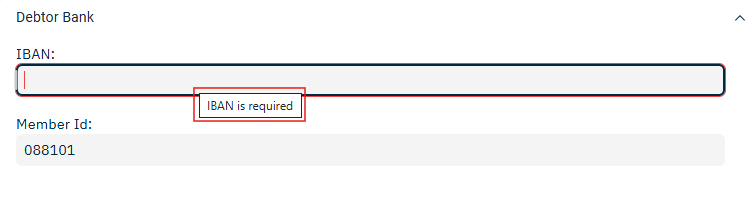
- Fields with invalid or missing data are highlighted with a red border.
- Hovering over a highlighted field shows a tooltip with a clear explanation of the issue.
- The form cannot be submitted until all errors are corrected.
Common types of validation include:
- IBAN format verification
- Checks for mandatory fields (e.g.
AddressLinein case address is given in that format) - Amount format and value validation
- Creditor and Debitor Names fields validation
- Logical consistency checks (e.g., the debtor and creditor cannot share the same IBAN)
Submitting the Payment
Once all required data is valid:
Click Submit to send the payment for processing.
- If the submission is successful:
- The form is cleared automatically.
A green confirmation popup appears in the lower-right corner containing the payment details:
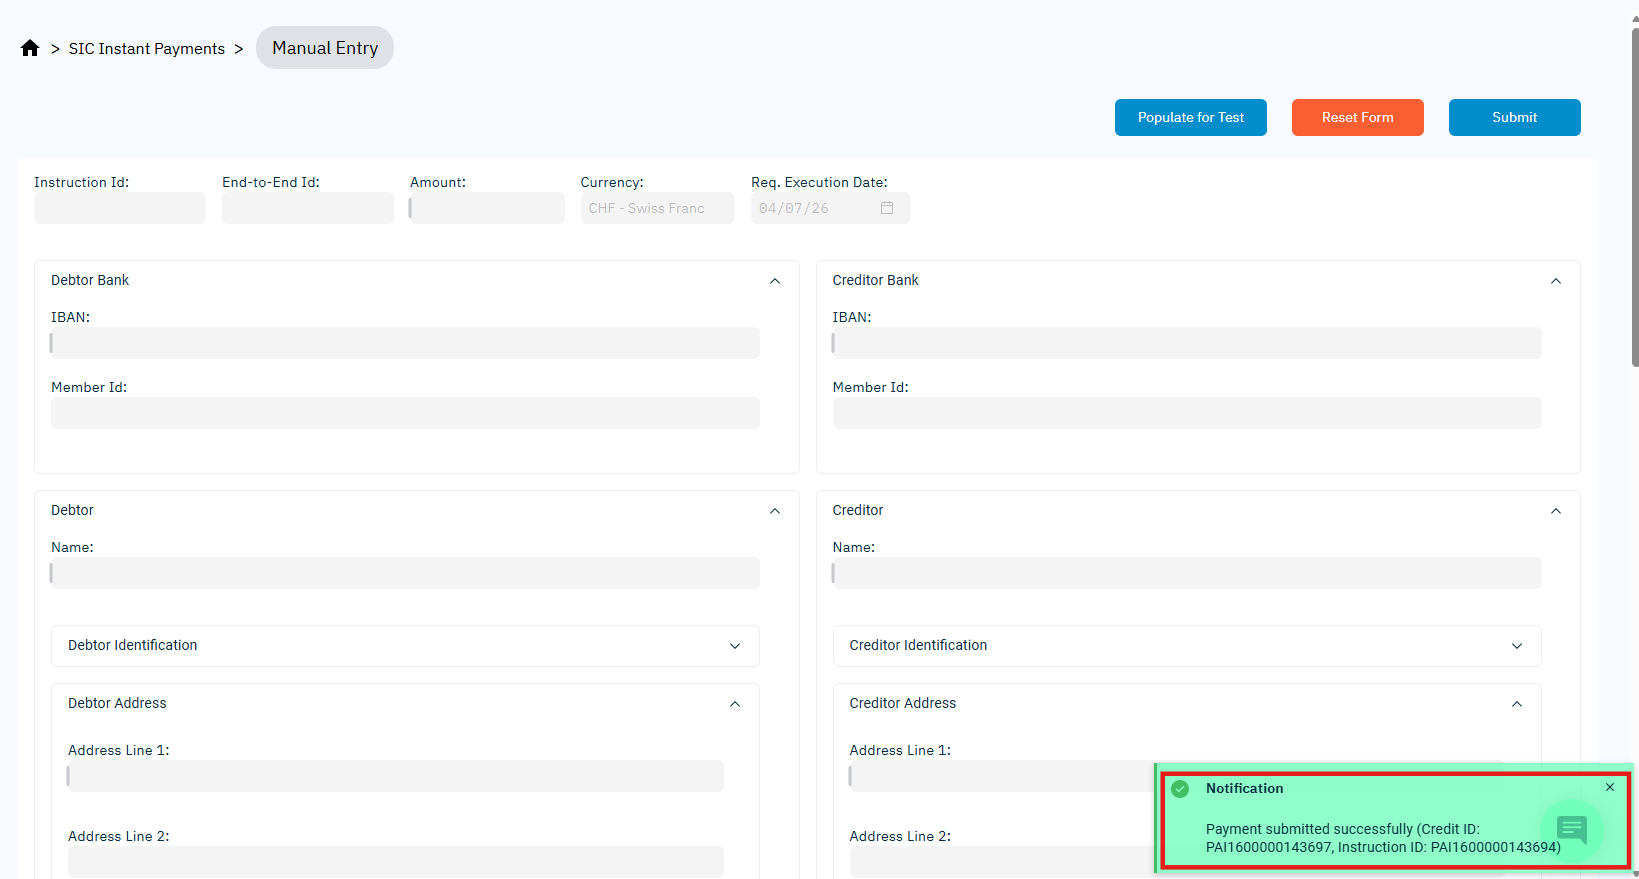
The newly created payment appears in the Transactions screen for approval, processing, or settlement.
A typical workflow for processing a SIC Instant payment in ImPAI is:
(The actual workflow steps and their order are configurable.)
Example: Creating a SIC Instant Payment
The following example walks through entering a new SIC Instant payment manually.
- Open the Manual Entry screen.
- Enter the following sample data:
- Expand or collapse sections as needed (e.g., Ultimate Debtor, Purpose, Category Purpose), and fill them only if required.
- Review the form and ensure all required fields are valid.
- If errors exist, a red frame appears around the field, and hovering over it shows the validation message.
- Click Submit to send the payment for processing.
| Field | Value |
|---|---|
| Amount | 250.00 |
| Debtor IBAN | CH0400700110001234567 |
| Debtor Name | Alice Sommer |
| Creditor IBAN | CH1200700110002345678 |
| Creditor Name | Max Schulz |
| Remittance Information | Invoice 2025-0147 |
If submission is successful, a confirmation message appears in the bottom left corner, and the payment is visible in the Transactions screen.
Clearing the Form
The Reset Form button clears all entered values in the manual entry screen and restores the form to its initial state.
It is especially useful when you want to discard partial or incorrect input and start over quickly.
Behavior:
- All text fields, numeric inputs, and dropdown selections are cleared.
- Automatically generated or system-controlled fields (such as Instruction ID, Currency, or Date) are reset to their defaults.
- Any validation warnings or error highlights are removed.
- The form becomes ready for new data entry.
Use Reset Form before entering a new transaction if you’ve already started filling fields for another payment or if validation errors make it easier to start fresh.