Working with Table Views
This chapter describes the common features and controls available across all table-based screens in the ImPAI platform.
These capabilities apply to all screen types presenting tables views:
| Screen | Purpose | Link |
|---|---|---|
| Transactions | View all payments processed within the selected processing domain / payment scheme, along with their current status and audit history. | 👉 Go |
| Approvals | Approve or reject payments that require authorization before being sent to the clearing network. | 👉 Go |
| Error Handling | Review and manage payments that encountered errors during validation, transmission, or processing. | 👉 Go |
| Interfaces | Monitor all inbound and outbound messages exchanged with external systems and clearing interfaces. | 👉 Go |
All table views across the application follow a unified design and provide a consistent set of core features. This ensures that users can interact with data in the same way on every screen. These shared capabilities include:
Each screen may offer additional, context-specific actions.
Refer to its dedicated page for details.
General Navigation
- Double-click table rows to open the record details.
- Click triangle icons to expand (
 ) or collapse (
 ) the related information.
 - Status values may be visualized using colored tags, making it easy to identify the current processing state without reading detailed information:
🟢 Green – Success
🔴 Red – Error
🟡 Yellow – In Progress
⚪ Gray – Processing not yet started
Toolbar Actions
| Icon | Action | Function |
|---|---|---|
| ﹢ | Add Filter | Adds an additional filter criteria. |
| Save Filter | Saves the current filter configuration for later use. | |
| Select Filter | Loads a previously saved filter set. | |
| Clear Filters | Clears all filter criteria. | |
| Refresh | Reloads the table data with the current filters. | |
| Column Settings | Allows to select or deselect the columns shown in the table. |
…and in the header line of the data table as an additional action you will find the following:
| Icon | Action | Function |
|---|---|---|
| Export | Download current result set as CSV, or PDF. |
Filter Panel
The Filter panel shows the active filter settings used for the displayed data in the table view.
Multiple filters can be combined using AND logic.
Depending on the type of the filter, supported operators are:
equals,contains– for string parametersin list– for enumeration parametersfrom,to,between– for date or amount parameters
Always confirm you are in the correct date range for the Processing Date or Created Date before analyzing transactions.
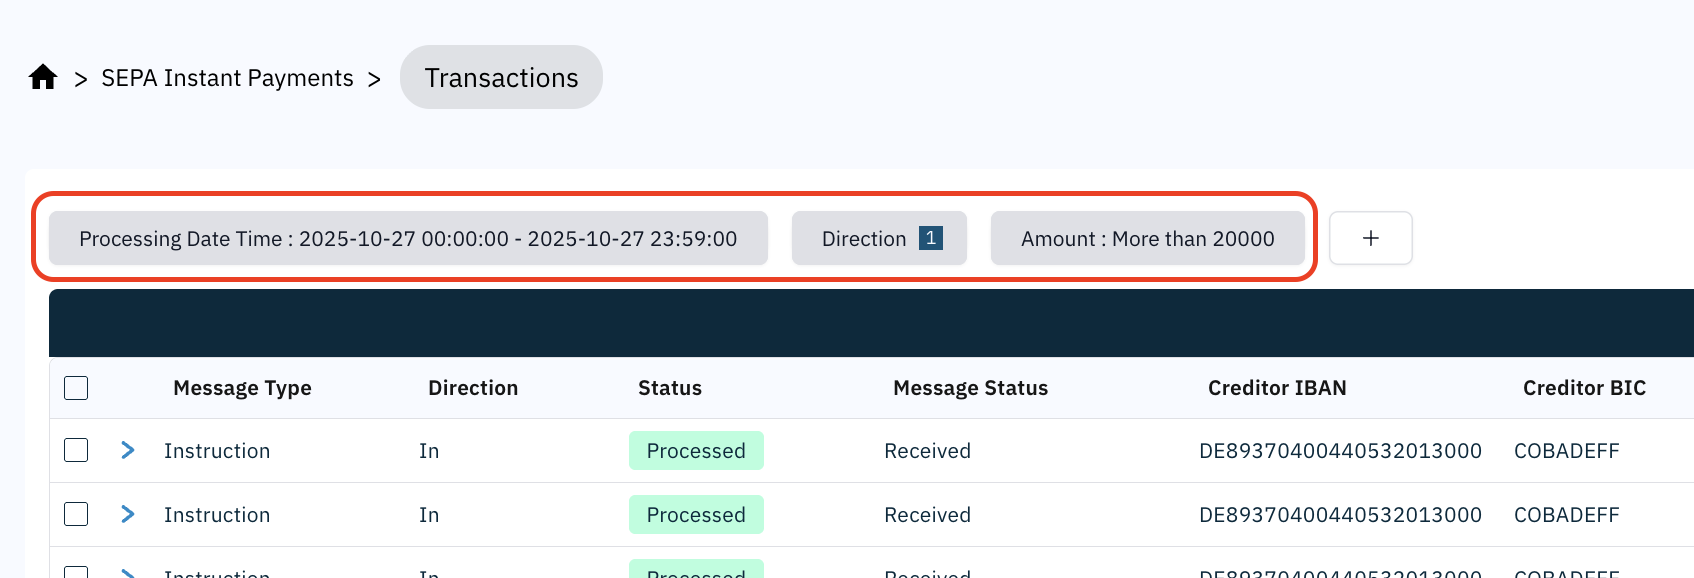
Using Filters to Customize the Transaction View
To narrow down and customize the displayed transaction data, you can use the Filter feature. This allows you to select which columns or data attributes should be visible in the transaction table.
Step-by-Step Instructions
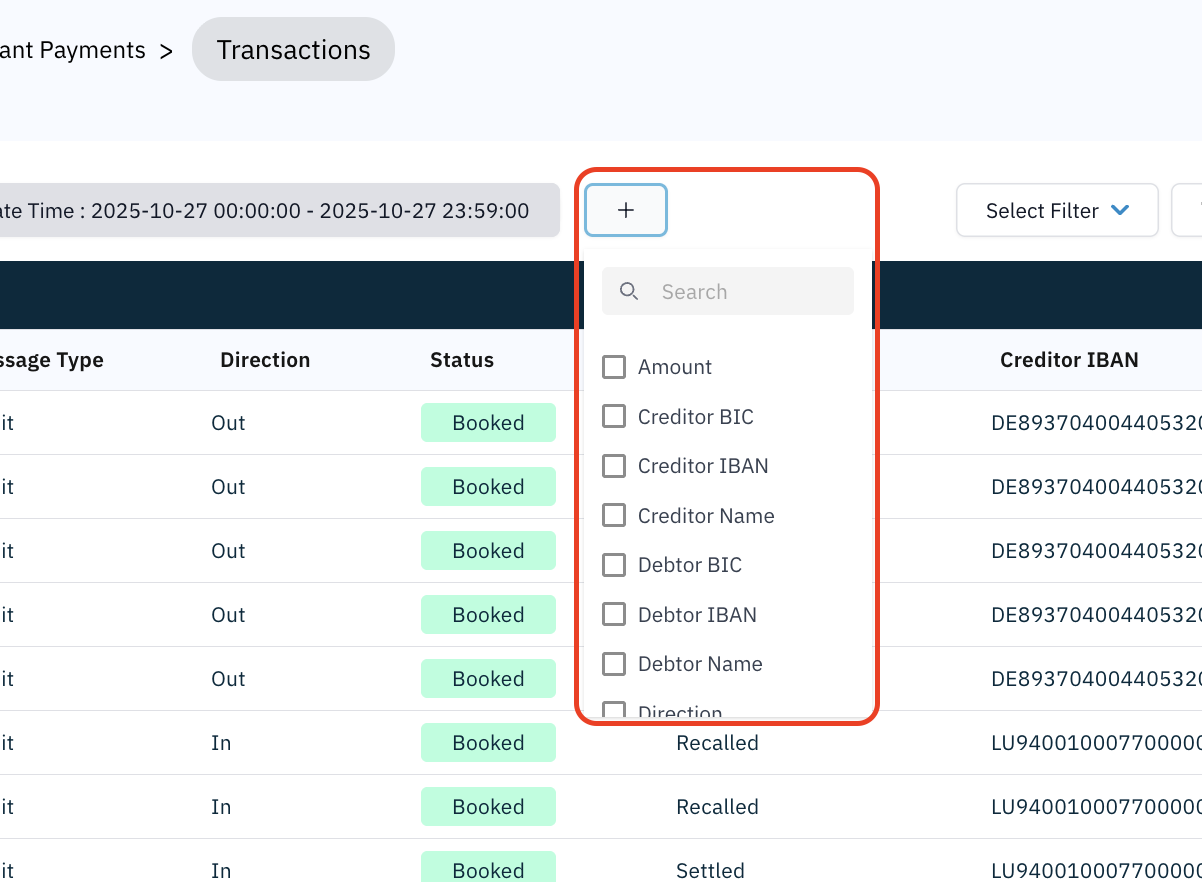
- Click the
+Button
On the top of the transaction list, locate and click the - Select Filters From the list of available filters, tick the checkboxes next to the attributes you want to display.
- Search for a Filter Use the search bar at the top of the filter panel to quickly find a specific filter attribute.
+ button. This opens the filter selection menu.Example filter selection menu from SEPA Instant → Transactions:
Available options differ depending on the type of data displayed and can be viewed in each screens Complete Filter Reference section.
Selected filters immediately affect which columns are shown in the transaction table, helping you focus on the most relevant data for your task.
Saving and Loading Filter Sets
Filter sets allow you to store frequently used filter configurations and quickly reapply them later. This helps you avoid re-entering the same criteria each time.
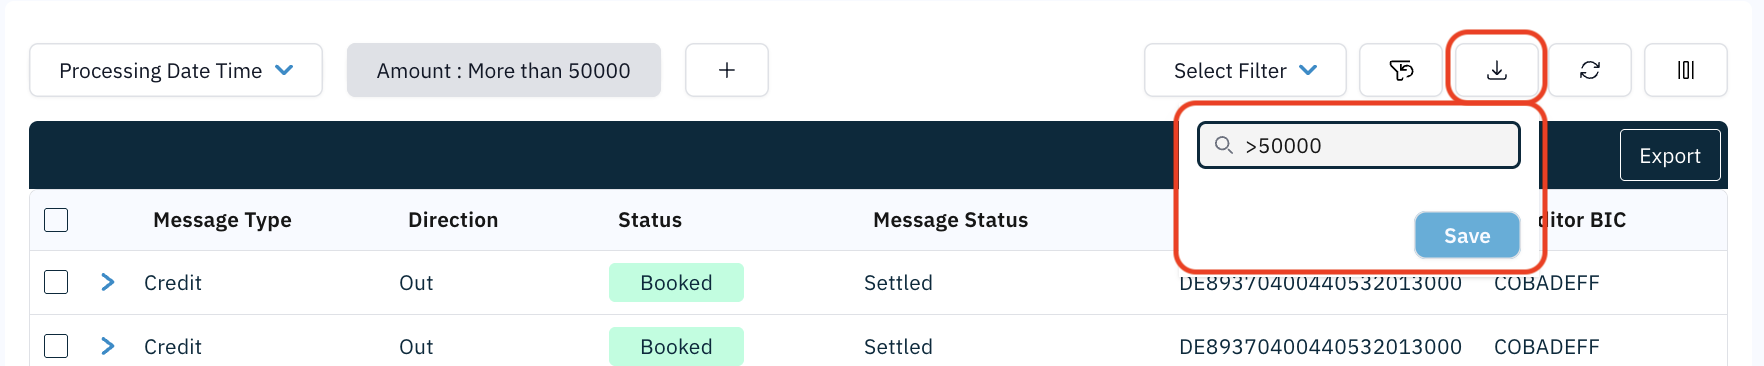
Saving a Filter Set
- Configure all desired filter criteria in the Filter Panel (e.g., Message Type, Status, Date Range, Creditor, Amount).
- Click the
 Save Filter button.
 - Enter a meaningful name for the filter set (no blanks allowed).
- Click Save to confirm.
Saved filter sets are stored per user and per screen.
For example, a filter saved on SEPA Instant → Transactions will not appear on SEPA Instant → Approvals.
Use descriptive names, such as YesterdayIncomingErrors or High-Value-Outgoing, to quickly identify the purpose of each saved filter.
Loading a Filter Set
- Click the Select Filter button to open the list of saved filter sets for the current screen.
- Select a filter set by name.
- The system loads the filter criteria into the Filter Panel and refreshes the table automatically.

The table content updates immediately to reflect the loaded filter configuration.
- Only filter sets saved by the currently logged-in user are shown.
- Filter sets are screen-specific and are not shared across different screens.
- Loading a filter set replaces the active filter configuration in the Filter Panel.
Sorting & Columns
- Click any column header to sort the table data.
- 🔼 1st click: Sorts the column in ascending order.
- 🔽 2nd click: Sorts the column in descending order.
- ↩️ 3rd click: Removes sorting and restores the default order.
- Click the
 Column Settings button to choose which fields are displayed in the table.
 - Columns can be dragged to reorder and resized by adjusting the column boundaries in the header row.
Sorting via the column header applies only to the records displayed on the current page.
It does not sort the full result set across all pages.
Paging the Table
When the total number of records exceeds the selected page size, the results are split across multiple pages.
The paging bar below the table allows you to move between pages and control how many records are displayed per page.

- Click the left or right arrows to navigate to the previous or next page.
- Click the page size selector (default: Auto) to choose how many rows are shown per page:
Auto,10,20,50, or100items per page. - Click the Page X button to open a page list and jump directly to a specific page.


When Auto is selected, the system automatically adjusts the number of rows shown per page based on the available screen space and window size.
This ensures the maximum number of rows is visible without requiring vertical scrolling.
If you are looking for a record that is near the beginning or end of the result set, use the Page X page selector instead of navigating page by page.
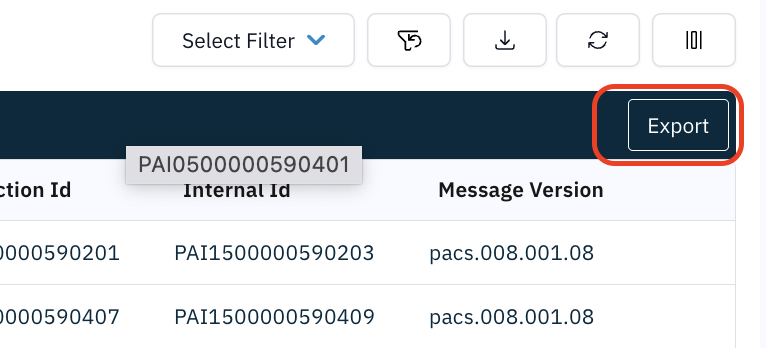
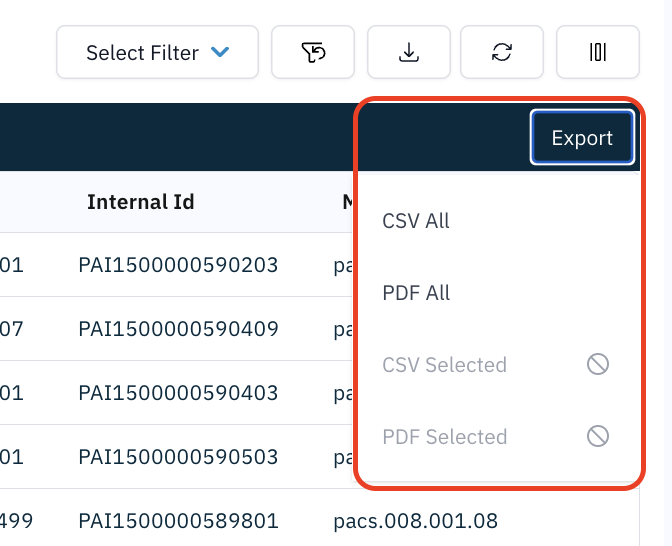
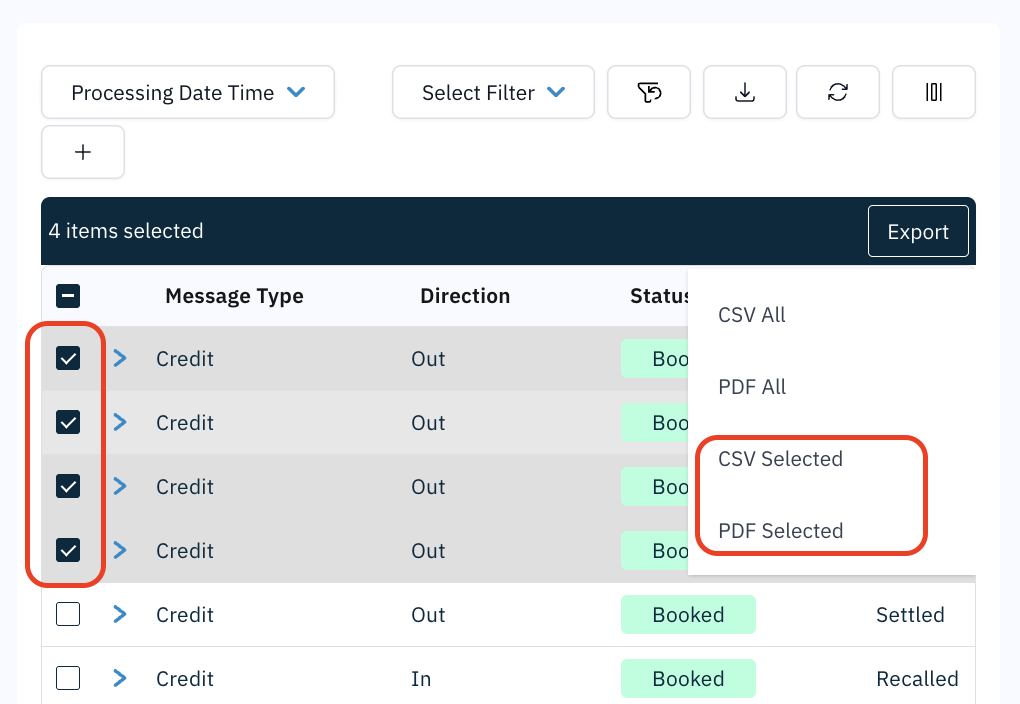
Export
Exports include all visible columns and active filters. You can choose to export the full result set or select certain rows from the table and export only your selection.
- Click on the Export button in the header line of the table.
- Choose from the available options by clicking your choice - "All" to export the full result set:
- Or, if you select one or more rows from the result set, choose to export the "Selected" rows only:
The export process runs asynchronously. Once completed, the files appear in your computer’s Downloads/ folder.
Exported files follow a standardized naming pattern:
ImPAIdataTypeExport_YYYYMMDD_HHMM.csv
ImPAIdataTypeExport_YYYYMMDD_HHMM.pdf
where:
dataTypeis replaced with the screen context (e.g.,Transaction)YYYYMMDD_HHMMis the export timestamp